DIY LED Disco Kilt: Wearable Costume for Dancing and Going Out
Where Heritage Meets the Dance Floor
I love kilts. I now own six of them, which feels appropriate given that I’m a quarter Scottish. But I also love disco. For over 25 years, I’ve been swing, blues, and disco dancing, even creating an alter ego called Disco Stu that once won me a $500 costume contest for my outfit and dance moves. So when I was discussing the idea with some friends about combining these two passions, I knew I had to make it happen.

My goal was to build a disco kilt I could actually wear dancing, going out, and to events. DragonCon seemed like the perfect debut venue since I was already presenting on LED wearables. I was confident that people would go crazy for the sparkles and shine. What I didn’t anticipate was just how challenging (and rewarding) the journey would be.
If you want a deeper hardware breakdown for LEDs, controllers, and power tradeoffs, check out my DIY LED lanyard build guide.
Failed Attempts and Valuable Lessons
My first instinct was to simply make a kilt out of disco fabric. Reality check: way too flimsy. That wouldn’t hold up to any kind of movement, let alone dancing.
Next, I discovered glass disco tiles on Amazon that could be added to any material. Perfect, right? Wrong. These tiles were made of glass, which created multiple problems. Yes, they looked amazing, but they were incredibly heavy and brittle. Every time I sat down, tiles would break, leaving dangerous glass shards everywhere. That was a non-starter.
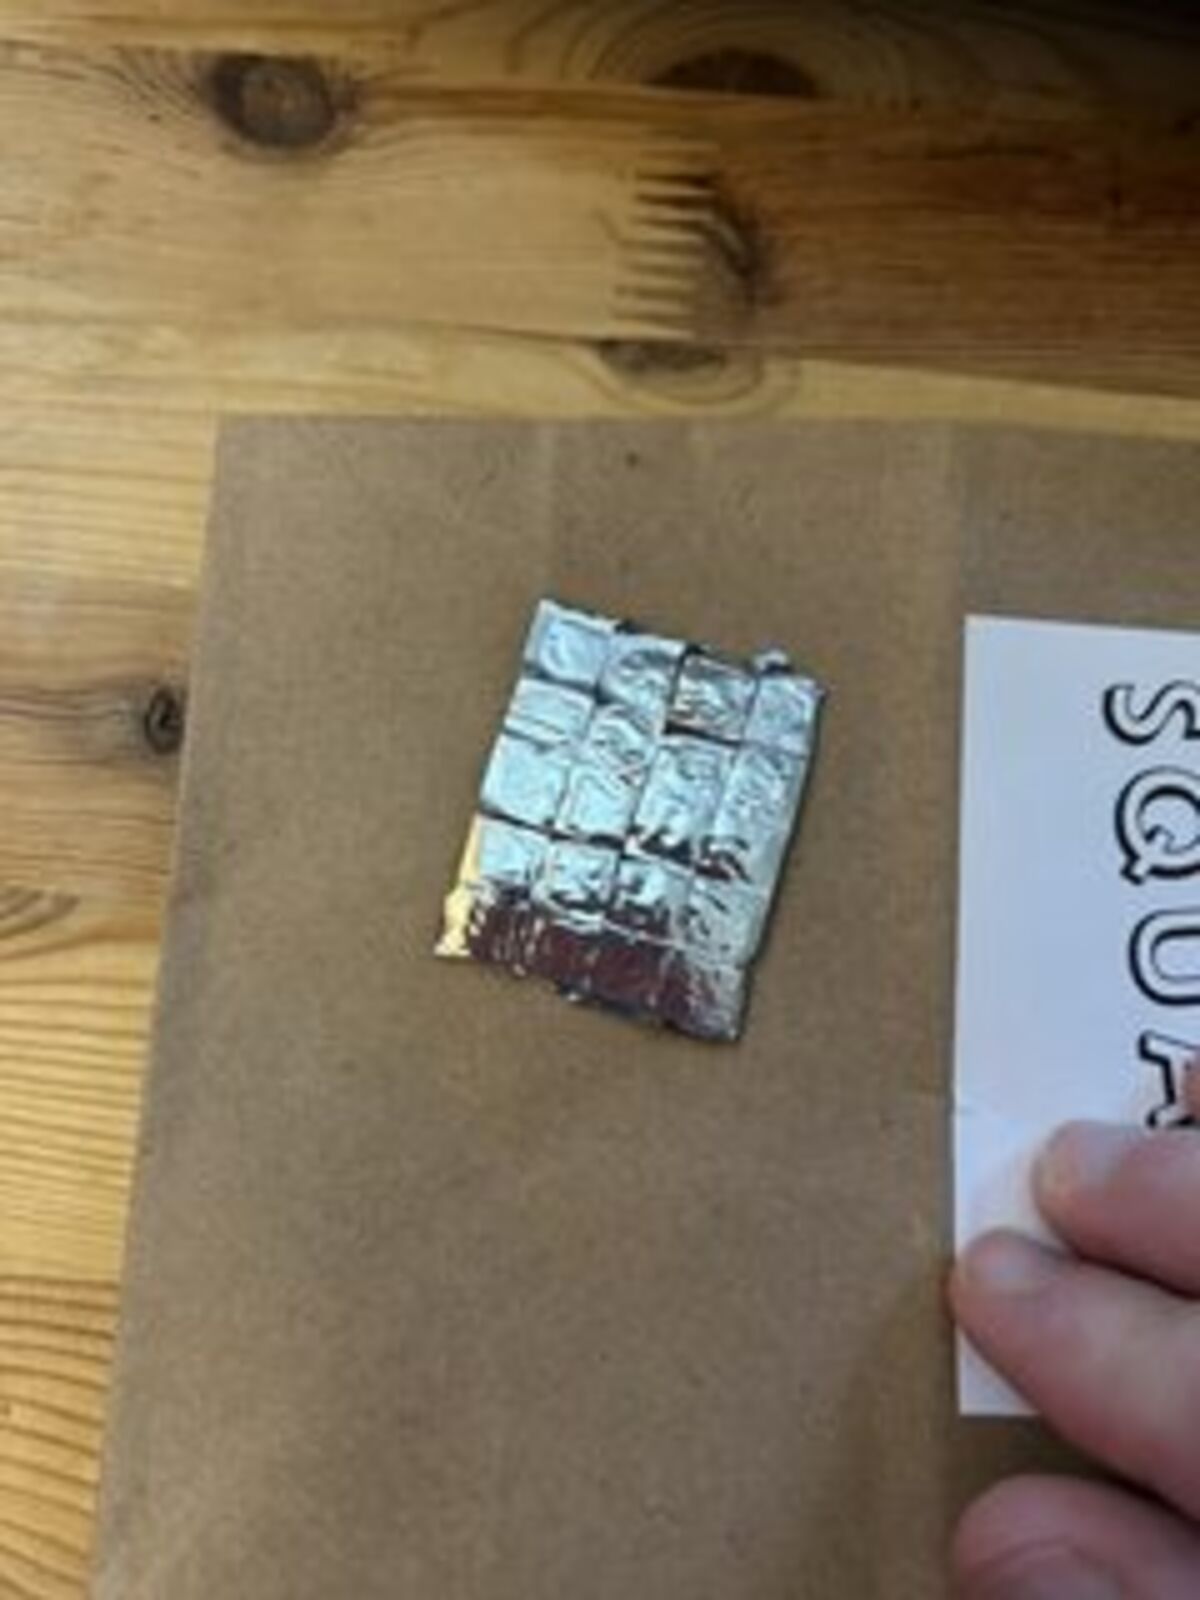
Attempt number three involved mylar (a super shiny material) and 3D printing. I created a mesh square and glued mylar pieces onto it. The result? Disappointing. It didn’t shine as well as I’d hoped and looked messy rather than polished.
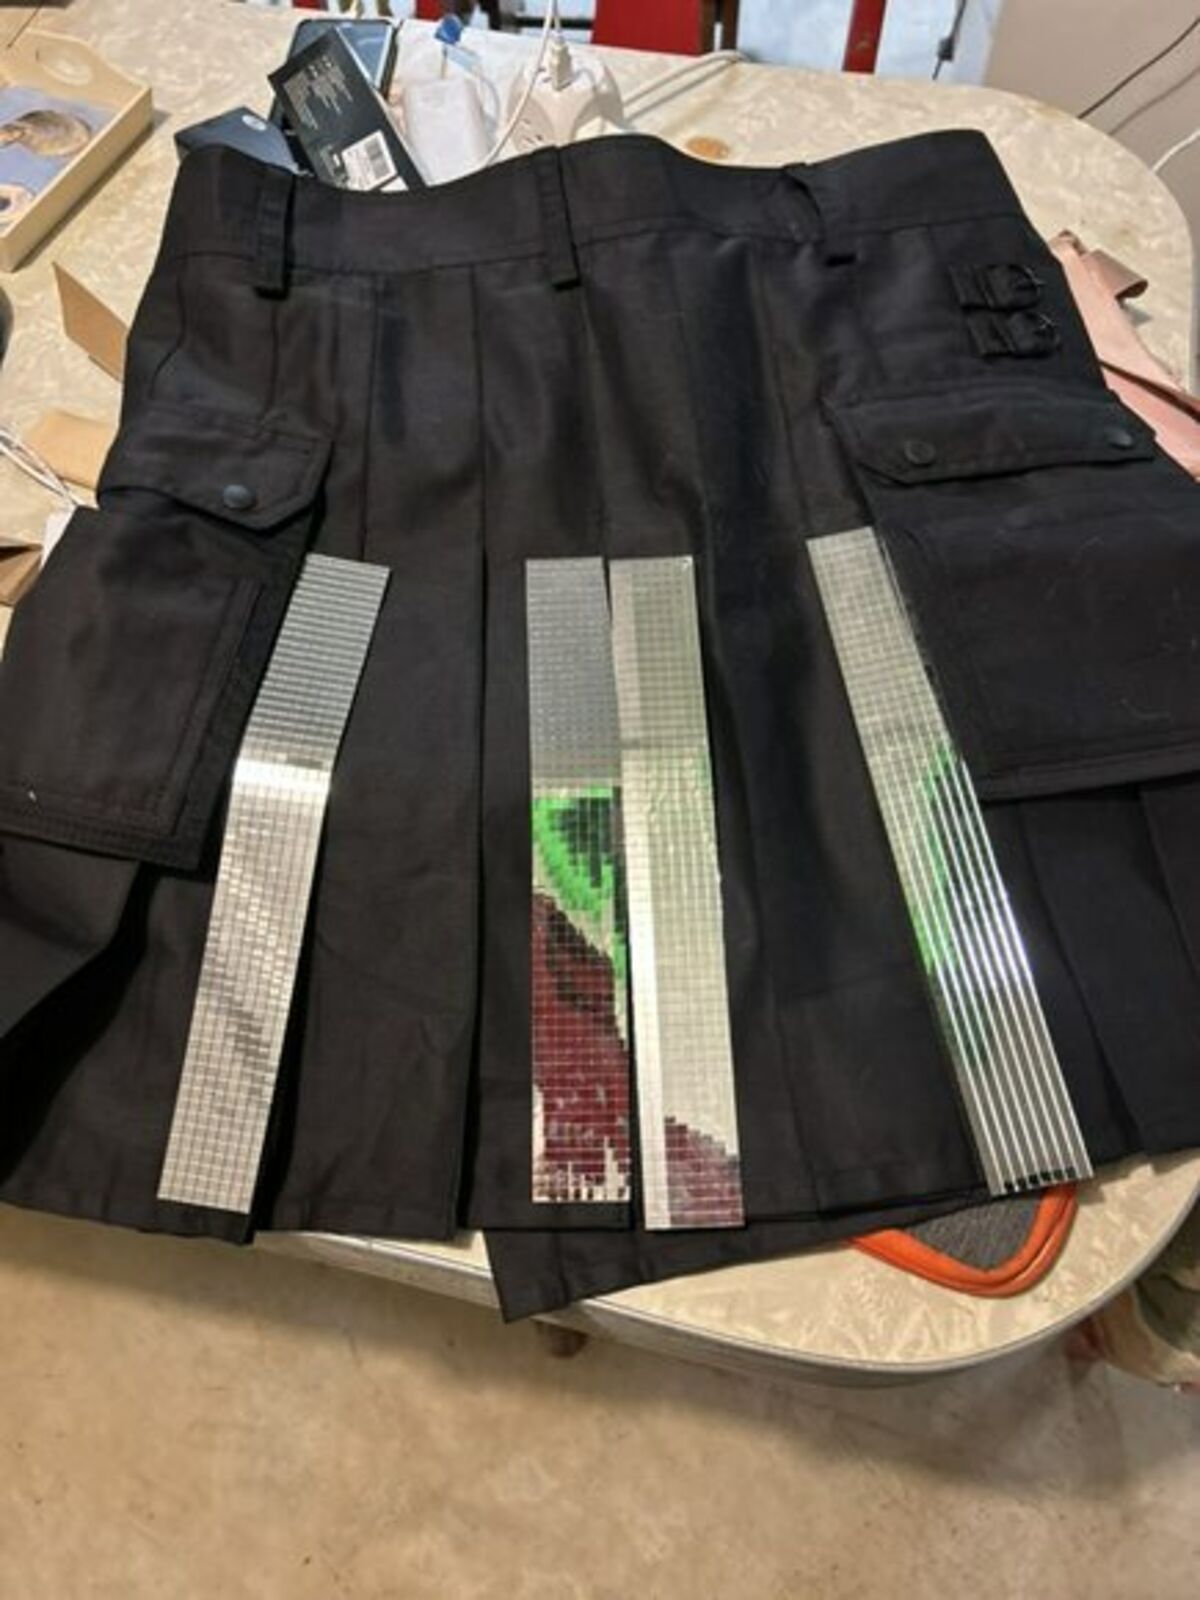
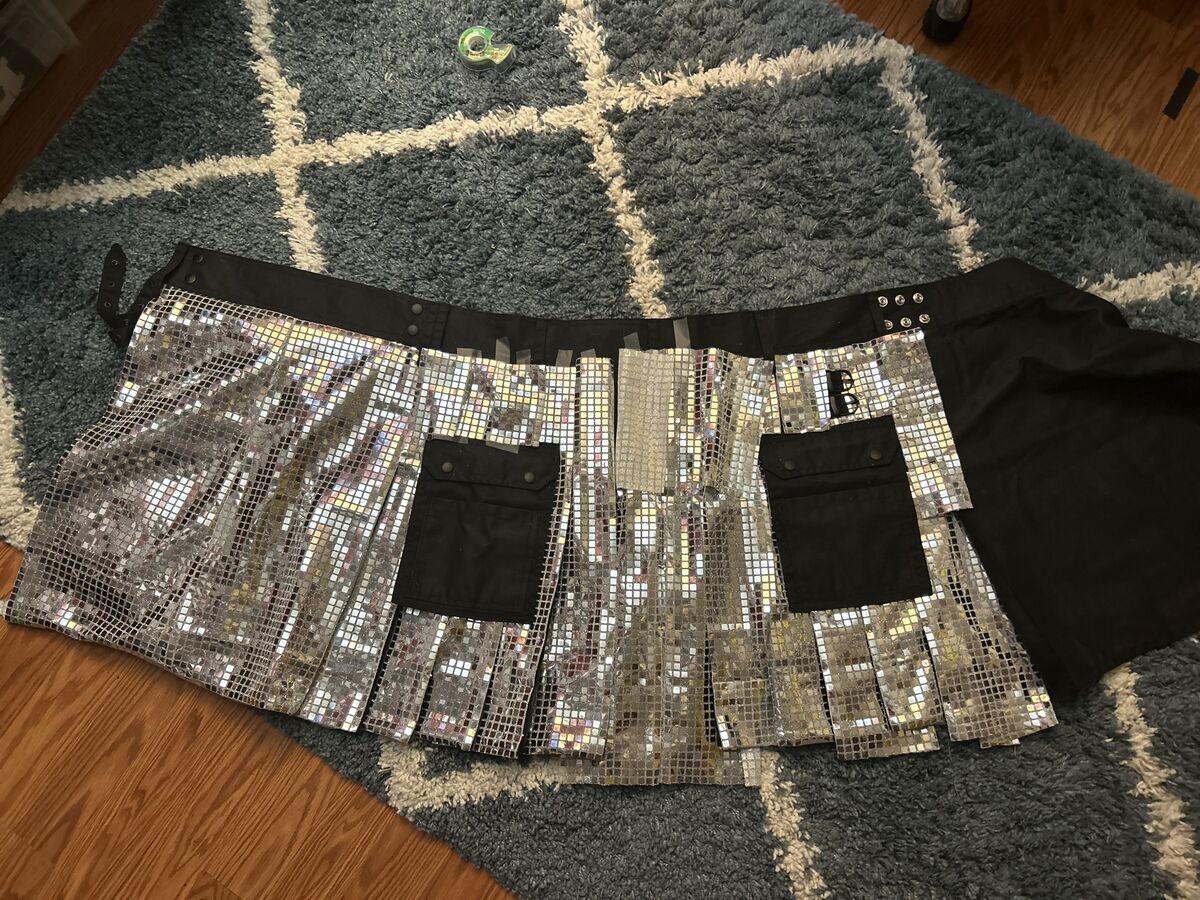
Finally, I found the winning combination: taking an existing kilt and sewing disco fabric I found on Amazon onto it. I briefly considered learning to sew well enough to make a kilt from scratch, but I didn’t have the right sewing machine, the time, or the confidence that my very first sewing project should be something this complex.
Learning to Sew (Finally!)
Here’s the thing: I didn’t know how to sew. At all. But this project gave me the motivation to learn. I contacted a friend who’s a master seamstress, and she graciously agreed to teach me.
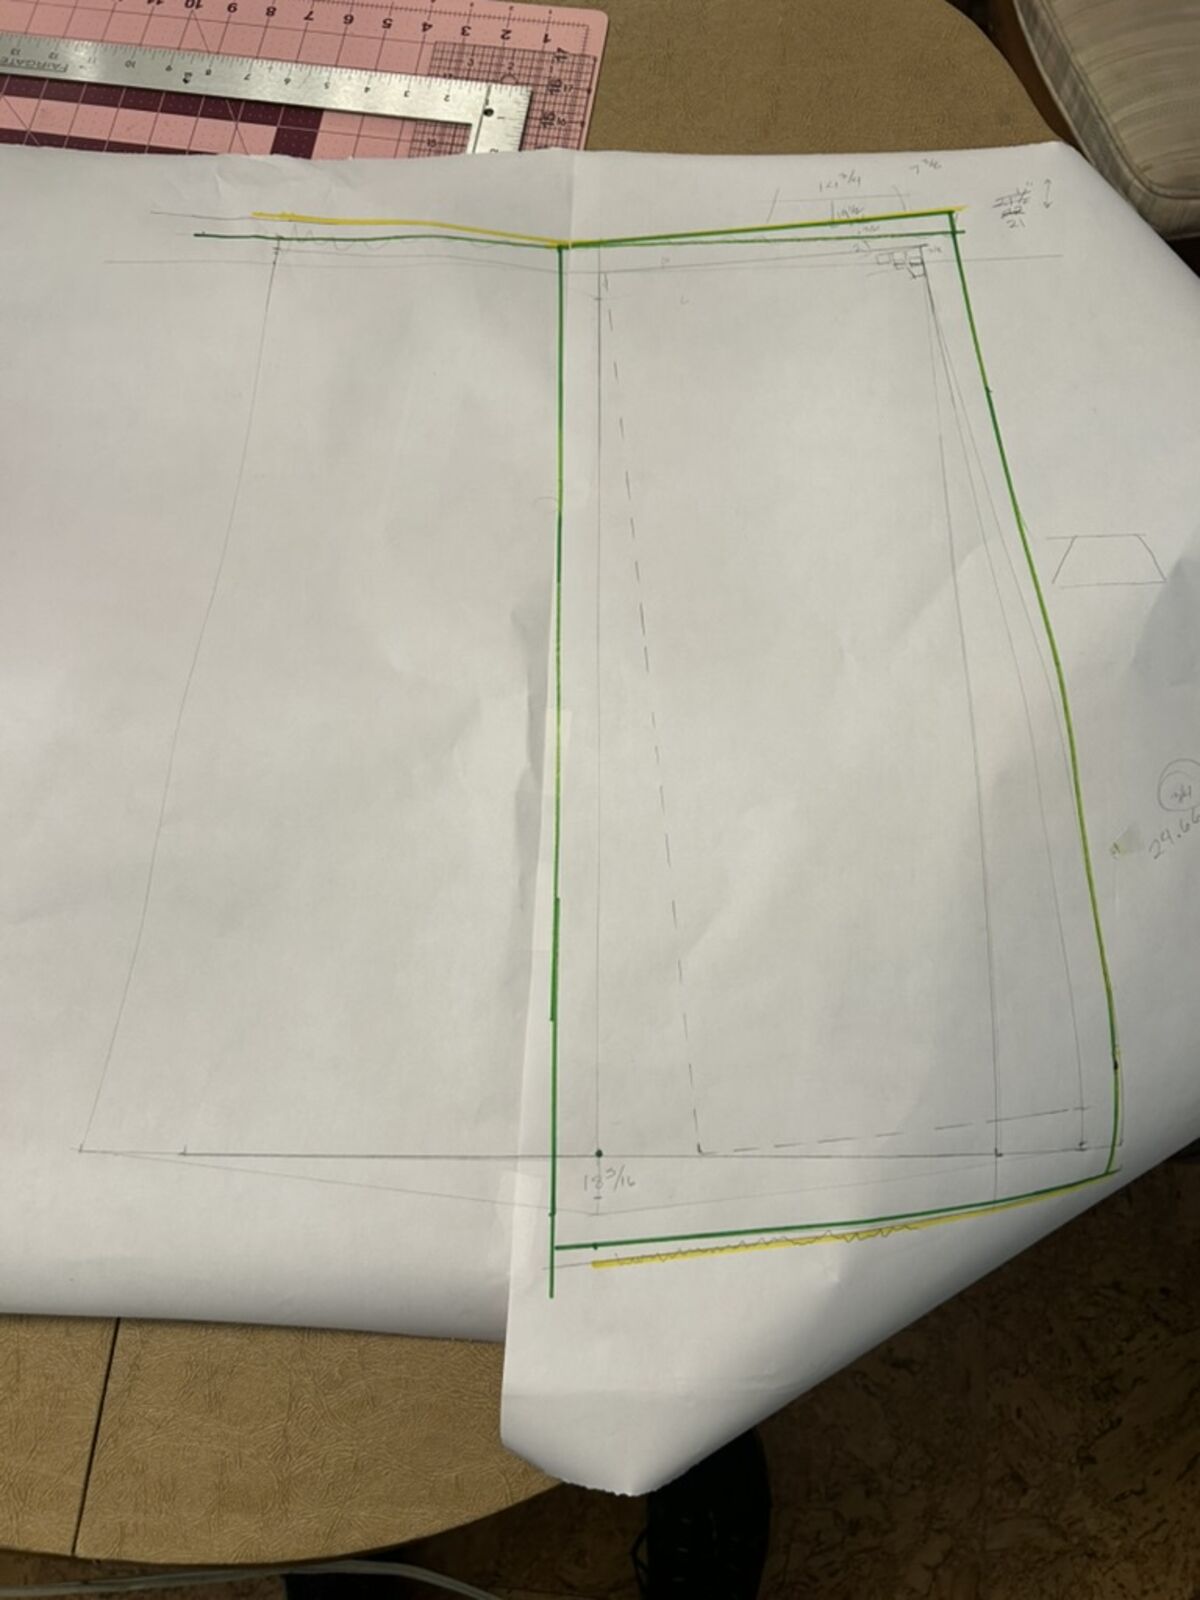
We experimented with different techniques and patterns until we found an approach that worked and looked clean. The most difficult part was the front panel. We wanted the edges of each disco square to line up perfectly with the folds for a polished look. This required creating a custom design for the front panel so the edges would be clean and fold precisely in the middle. There’s no way I would have figured this out on my own for my first sewing project. I’m incredibly grateful my friend helped me navigate this challenge.
Prototyping the Pleats
Then came the pleats, which required serious trial and error. I used fabric and scotch tape generously to prototype different approaches.
My first version involved layering the disco fabric on the inside of every other pleat. I was worried that if the entire kilt was disco fabric, it wouldn’t read as a kilt anymore. But once I saw it on, I immediately ripped it all out. It just didn’t look right.
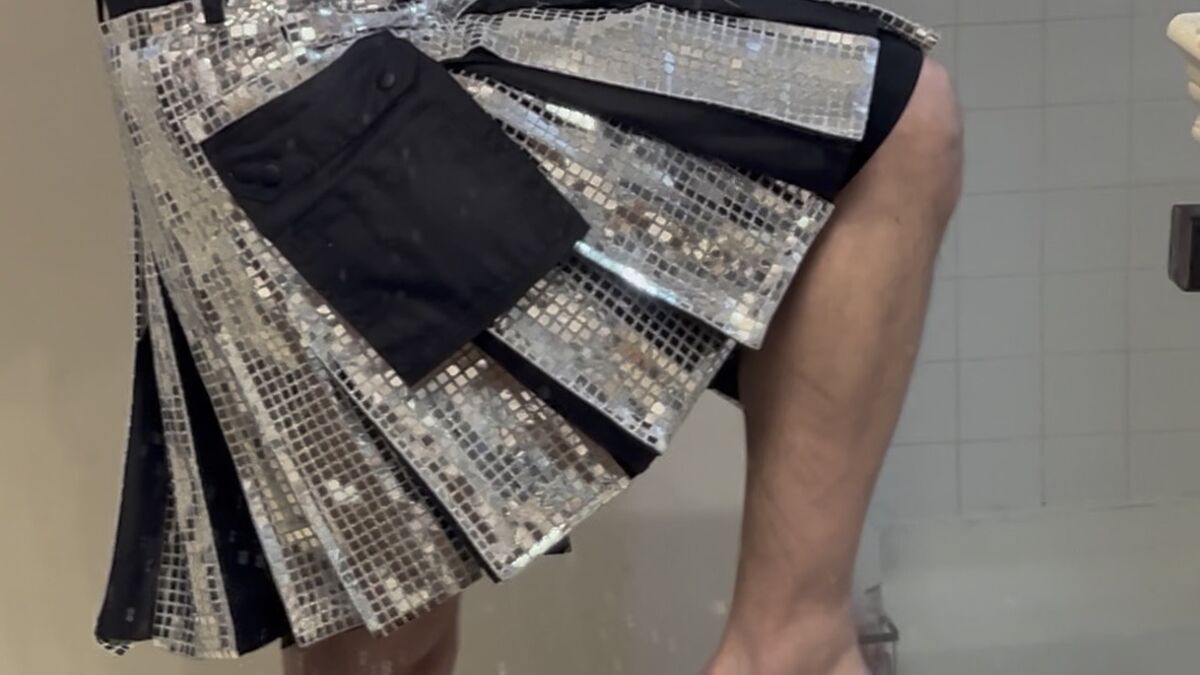
My second version layered the fabric on the outside of each pleat. I took one look at myself in the mirror and knew I was on the right track. This was it.
Adding the LEDs
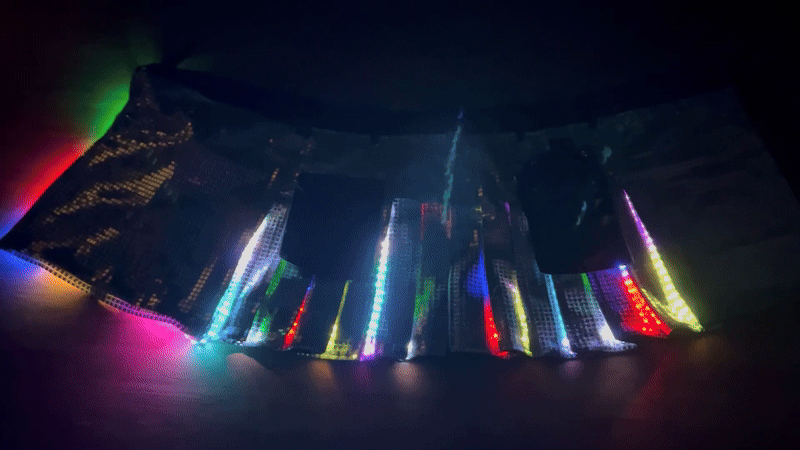
Since I still had time before DragonCon, I knew I could take it to the next level with LEDs. The challenge was figuring out how to make the kilt illuminate itself without relying on an external flashlight.
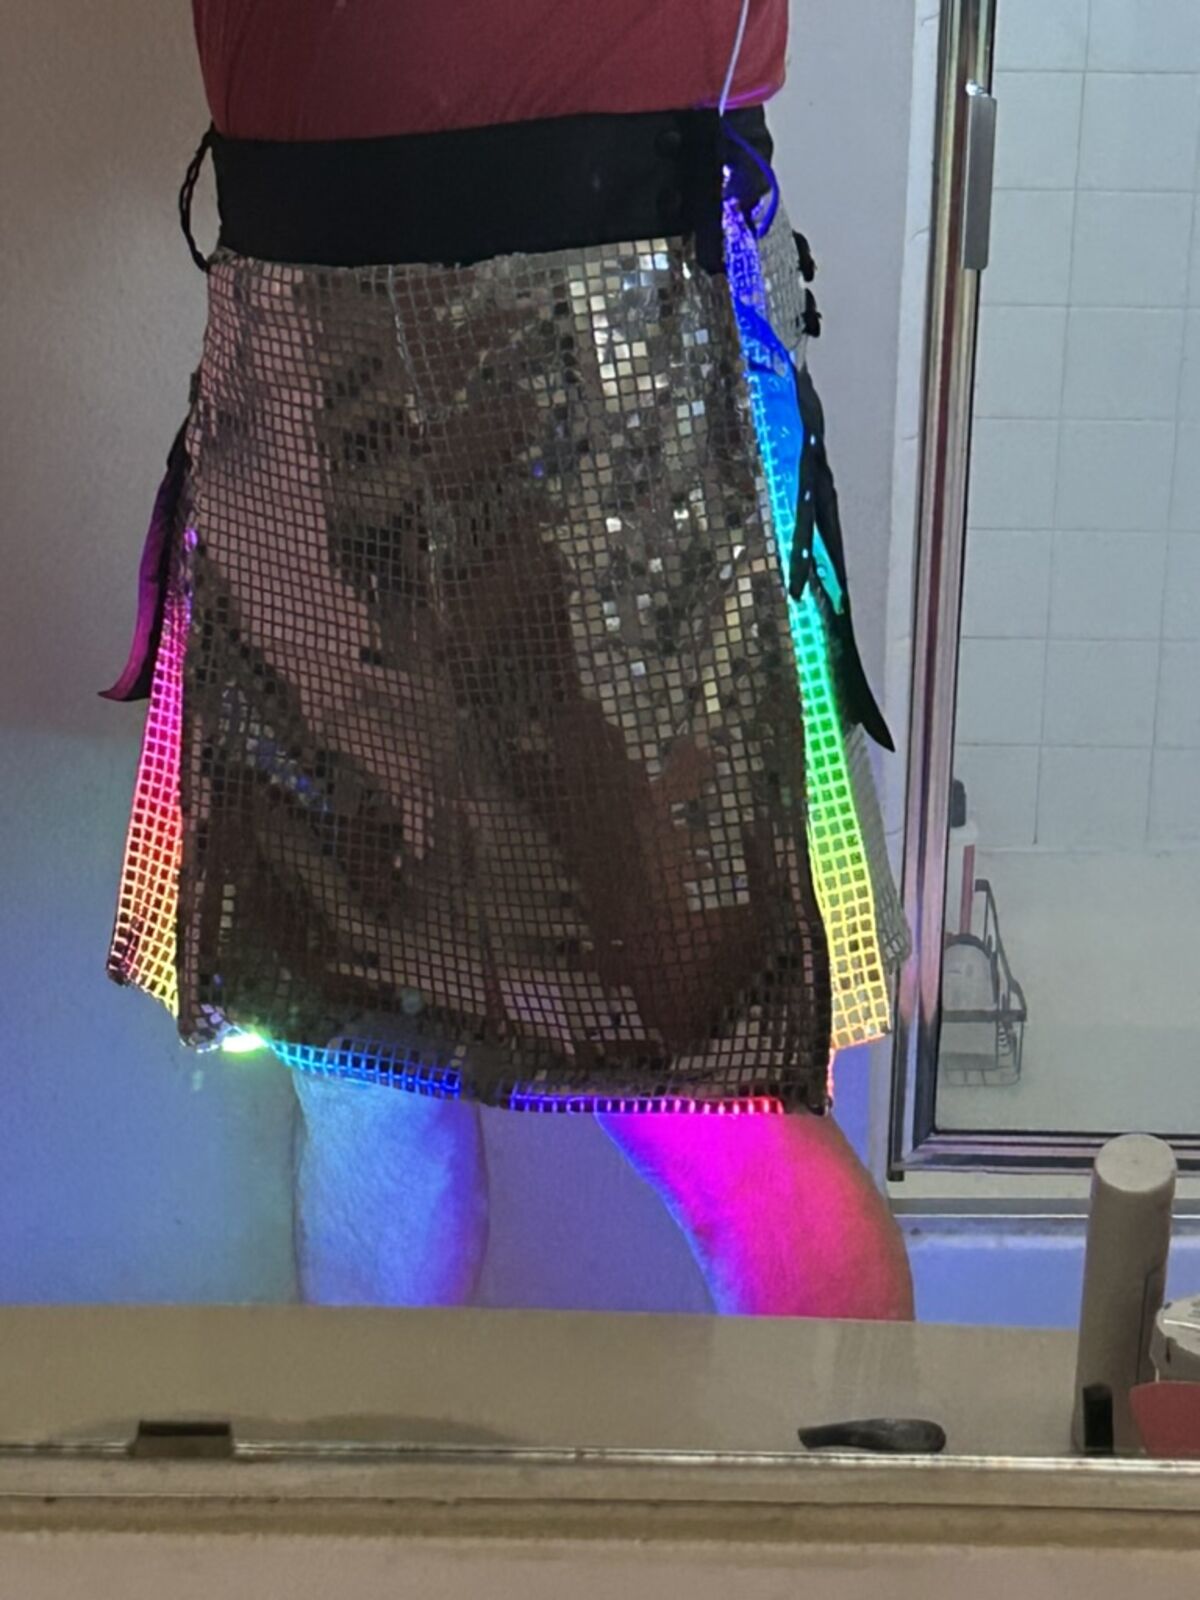
The solution: wiring LEDs to the back of each pleat so they would shine onto the front of the next pleat. I prototyped a few LED pleats first, then went to the mirror, turned off the lights, and absolutely fell in love. I knew this was the right path forward.
By the time I finished, I’d added over 15 feet of LEDs and 200 feet of wiring. I even learned about voltage drops the hard way when my LEDs started losing signal about three-quarters of the way through. All in a day’s work. Or week. Or however long it took while I binged multiple seasons of Anthony Bourdain and other shows during those 30+ hours of construction.
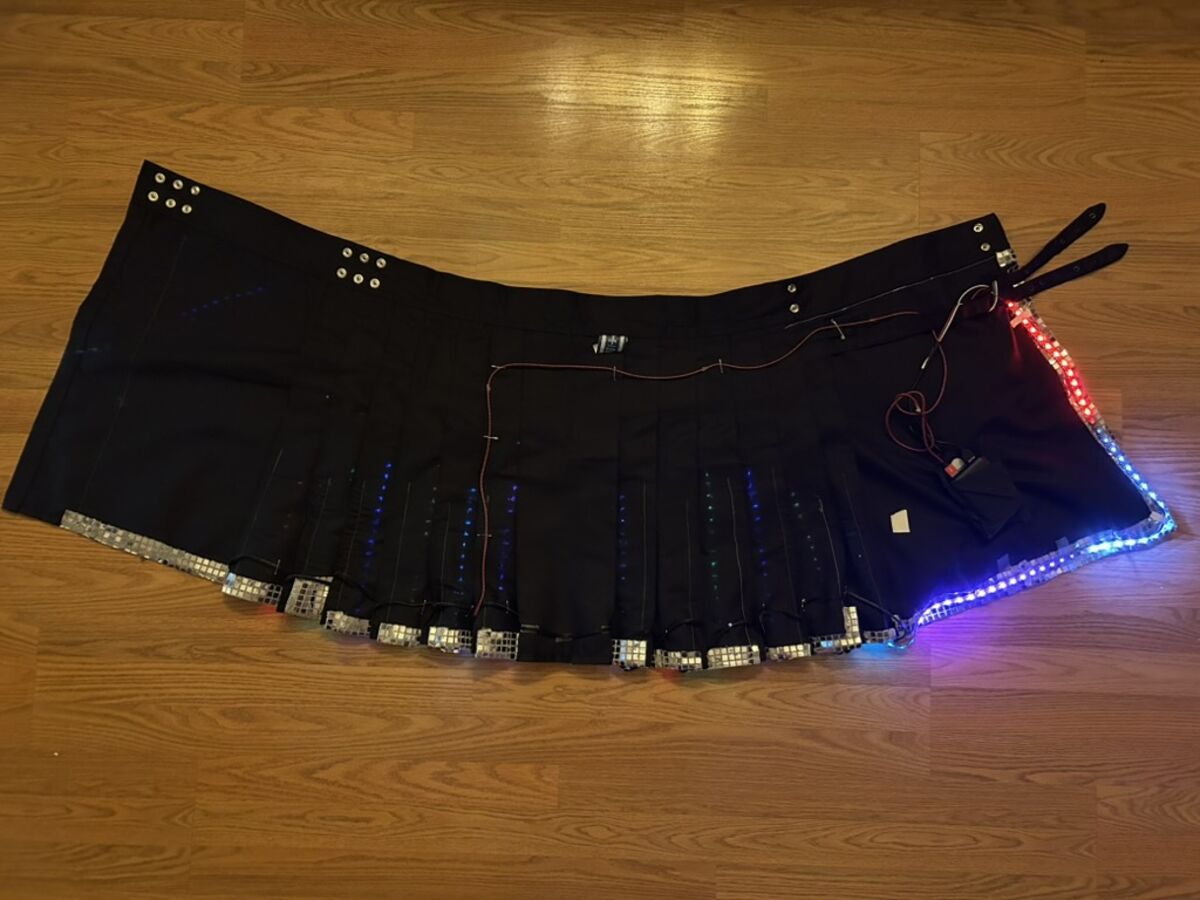
I also created an LED sporran to accentuate the overall effect.
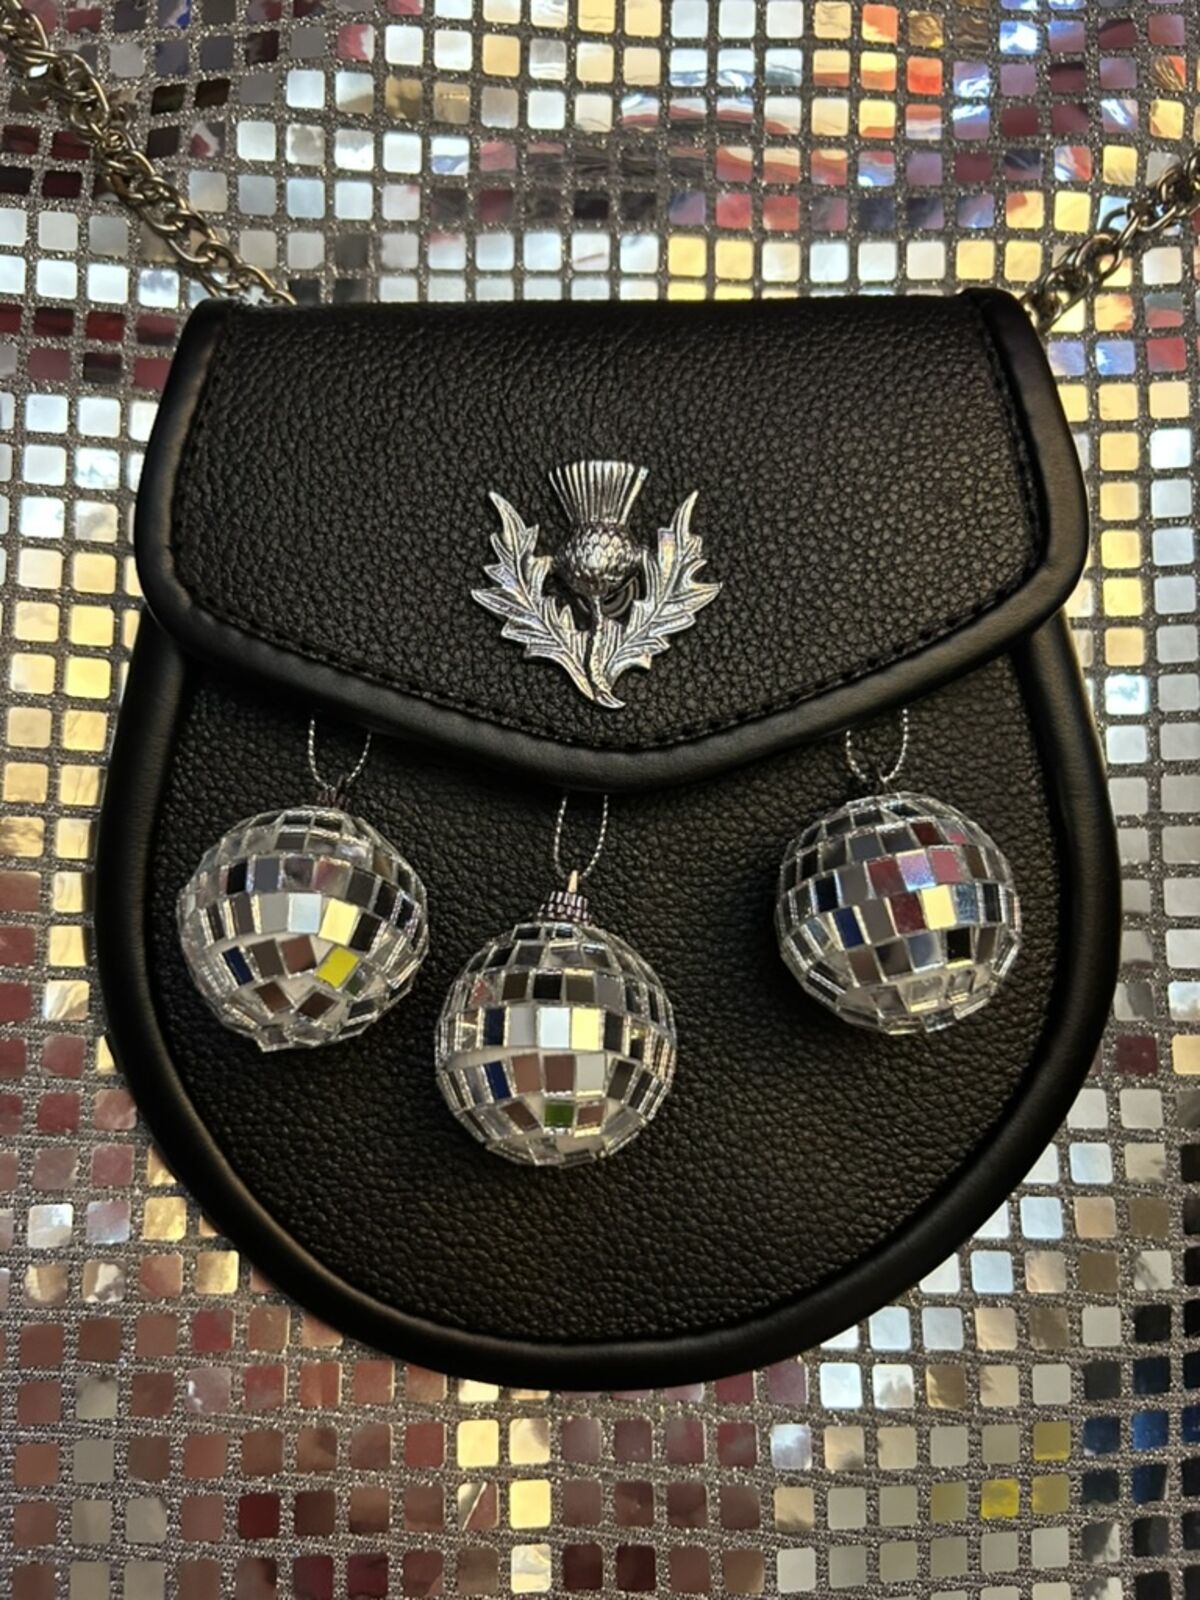
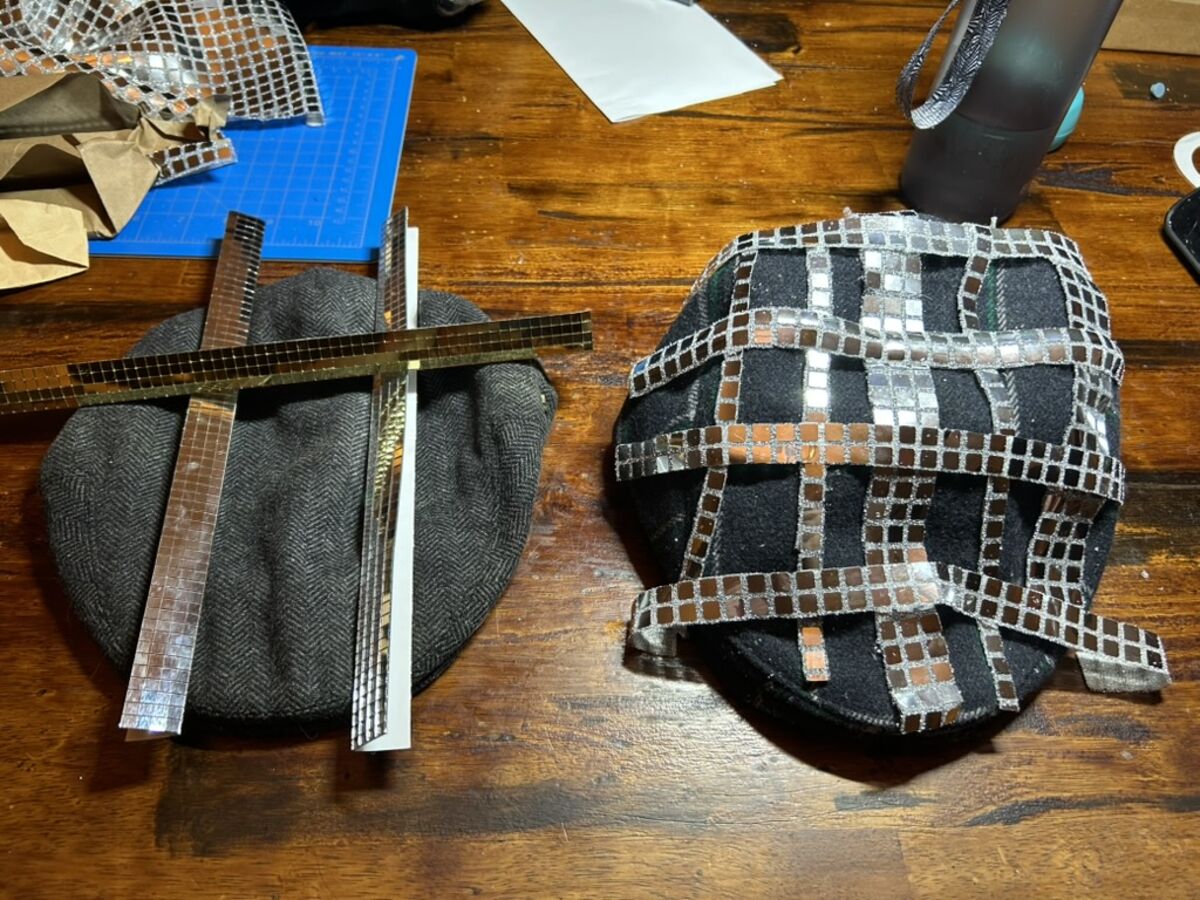
I attempted to make a tam (a Scottish hat) as well, but no matter what iteration I tried, it never looked quite right. There were just too many curves to work with.
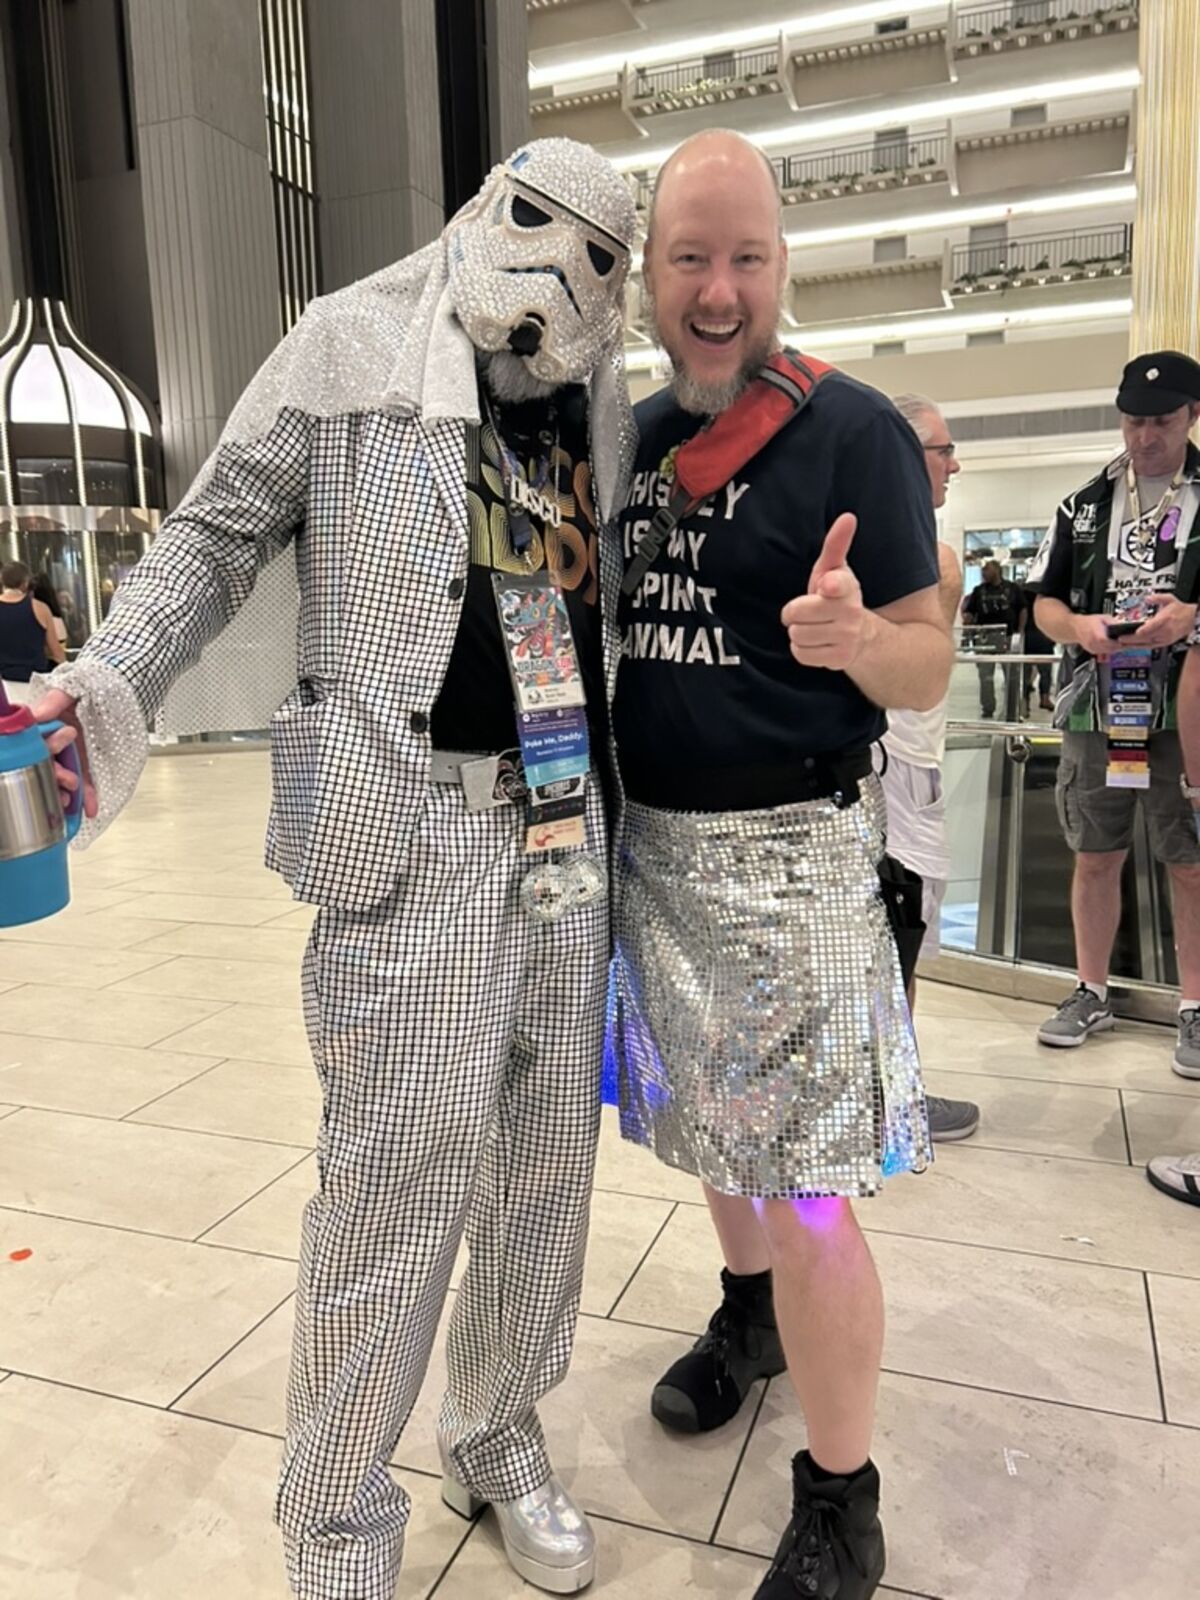
DragonCon Debut
When I finally wore the disco kilt to DragonCon, the response exceeded every expectation. People absolutely loved it. The highlight of my night came when a professional costume designer approached me and told me “This is impeccable”. That single compliment made every hour of work worthwhile.
Was it perfect? Not quite. It was occasionally awkward to dance in, and the wiring gave out a few times due to all the bending and movement. But I already have ideas for reinforcing those weak points for version 2.0.
Reflections
Overall, this was an amazing project. I learned so much about sewing, LEDs, voltage, persistence, and problem-solving. I’m grateful for everyone who helped me along the way and for all the encouragement I received.
Most importantly, I love that I can express myself so vividly through disco, dance, and my Scottish heritage. The disco kilt isn’t just a costume. It’s a celebration of everything that makes me, me.
FAQ for disco kilt build
What materials worked best for this disco kilt project
Sewing disco fabric onto a real kilt was the best balance of durability, shine, and movement. Glass tiles and mylar prototypes looked promising but failed in comfort and safety.
How many LEDs and wires are in the final kilt
The final build used more than 30 feet of LEDs and about 200 feet of wiring. I placed LEDs behind pleats so each strip lights the next pleat from behind.
Was this wearable LED costume hard to build
Yes, especially for a first sewing-heavy project. The biggest learning curve was pleat alignment, power distribution, and avoiding voltage-drop issues across long LED runs.
Where to start if you want to build a beginner LED wearable
Start with a smaller project like my LED lanyard tutorial to learn controller, battery, and strip basics before scaling up to a larger costume.
Now, who’s ready to dance?
Disco Stu out.